Cuisinart Ice Cream Maker Gelato Recipe
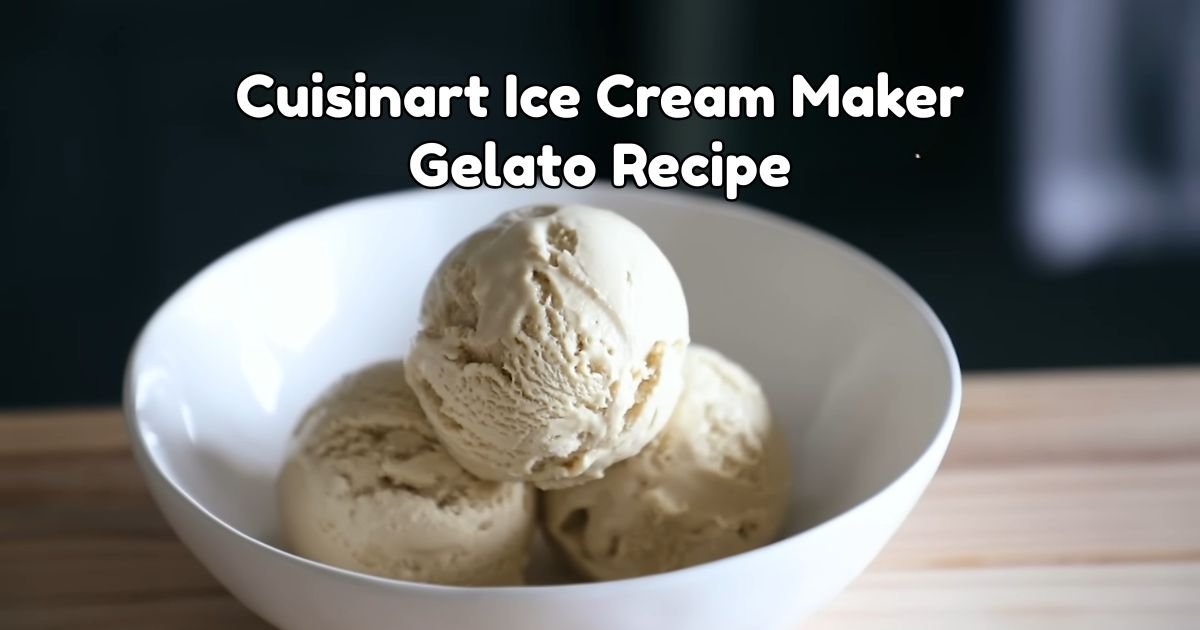
On a sunny, warm day, few things can match the joy of enjoying homemade gelato. This Cuisinart Ice Cream Maker Gelato Recipe turns just four simple ingredients into a rich and creamy dessert like the ones you’d find in a small gelateria in Italy.
The key is the balance of milk and cream. Gelato has more milk than cream, giving it a dense, smooth texture that feels luxurious on your palate. This sets it apart from lighter traditional ice cream.
You don’t need special skills or tools to make this treat. Just a Cuisinart Ice Cream Maker, a mixing bowl, and a little patience as the mixture freezes.
Whether you want a quick dessert for a weekday, a treat for the weekend, or a homemade gift for a friend, this gelato recipe is a great choice. Get ready to impress your family and friends with your new gelato-making skills!

Why Homemade Gelato Beats the Store-Bought Kind
Store-bought gelato often sits in a case for weeks before it reaches your freezer. Homemade gelato is fresh, and you control exactly what goes into it. Real vanilla bean gives a deeper, warmer flavor than the vanilla flavoring used in most grocery store pints. You also get to pick your own mix-ins, so no more digging through a tub in hopes of finding more chocolate chips.
Making gelato at home costs less per serving than buying a pint at the store, especially once you start reusing the same basic recipe for different flavors. A batch of this recipe makes about 6 cups, which is close to three regular pints, for around the price of one store-bought container.
What Makes This Gelato So Creamy
Gelato gets its dense, smooth feel from two things: less air and less fat than regular ice cream. Regular ice cream churns quickly and pulls in a lot of air, making it light and fluffy. Gelato churns slower, so less air gets mixed in. That is why each bite feels heavier and richer, even though this recipe actually uses less cream than most ice cream recipes.
Sugar also plays a bigger role than people think. Sugar lowers the freezing point of the mix, keeping the gelato soft enough to scoop straight from the freezer rather than turning into a rock-hard block. Skipping sugar or cutting it by too much can leave you with gelato that is too hard to serve.
Ingredients for Cuisinart Ice Cream Maker Gelato
- 2 ¾ cups whole milk: Whole milk is the main ingredient for creamy gelato. If you want a dairy-free option, use oat milk or almond milk, but keep in mind the texture may be icier because these plant milks have less fat.
- 1 ¼ cups heavy cream: Heavy cream makes the gelato rich. You can use coconut cream as a dairy-free alternative, which also adds a hint of coconut flavor.
- 1 cup granulated sugar: Provides sweetness and helps keep the gelato scoopable. You can replace it with ¾ cup of honey or maple syrup, as both are sweeter and wetter than regular sugar.
- 2 vanilla beans, split lengthwise and seeds scraped out (or 2 tablespoons pure vanilla extract): Vanilla beans offer the best flavor, but pure vanilla extract works well too and is easier to find. Using real vanilla bean seeds adds little black flecks to the gelato, just like in shops.
- ¼ teaspoon salt: Adding a small amount of salt might seem unusual for dessert, but it enhances the sweetness and balances the overall flavor.
Tools That Make This Recipe Easy
- Cuisinart Ice Cream Maker (with the freezer bowl frozen ahead of time, usually 16-24 hours)
- A medium mixing bowl
- Measuring cups and spoons
- A whisk
- A freezer-safe container with a tight lid
- A small piece of parchment paper or plastic wrap, to press right on top of the gelato before freezing
How to Make Cuisinart Ice Cream Maker Gelato
1. Mix the Base: Combine milk and heavy cream in a mixing bowl. Add sugar, vanilla bean seeds (or vanilla extract), and salt. Whisk for about 2 minutes until the sugar dissolves completely. You shouldn’t feel any grit when you rub a little between your fingers.
2. Chill It Cold: Cover the bowl and refrigerate for at least 2 hours, or overnight. A cold base churns better and makes smoother gelato. Skipping this step can lead to icy gelato.
3. Churn in the Ice Cream Maker: Ensure your Cuisinart freezer bowl has been in the freezer for 16-24 hours before you start. Pour the chilled mixture into the machine and churn for about 20-25 minutes, following the machine’s instructions. The gelato is ready when it looks soft-serve and can hold its shape.
4. Add Mix-Ins (Optional): If you want to add chocolate chips, chopped nuts, cookie pieces, or fruit swirls, add them in the last 3-5 minutes of churning. This helps spread them evenly without breaking them into small pieces.
5. Freeze to Firm Up: Scoop the gelato into a freezer-safe container. Press a piece of parchment paper or plastic wrap onto the surface before closing the lid. This prevents ice crystals from forming on top. Freeze for at least 2 hours before serving.
6. Scoop and Serve: Let the container sit at room temperature for 5-10 minutes before scooping. This softens it enough for easy scooping without turning it into soup. A warm spoon dipped in hot water also helps to scoop through firm gelato.
Tips for Perfect Texture Every Time
- Prevent Ice Crystals: Ice crystals can make gelato grainy and unpleasant. Chill your base well before churning. After moving your mixture to the freezer, press plastic wrap directly on the surface. This keeps moisture away and prevents ice crystals from forming.
- Don’t Rush Churning: Be patient while churning gelato. If you stop too early, the mixture will be thin and soupy instead of creamy. If you churn for too long, the gelato may become grainy after freezing. The right time to stop is when the mixture thickens enough to hold soft peaks on a spoon.
- Check Freezer Temperature: A freezer colder than 0°F can freeze gelato too quickly, making it hard to scoop. Let your gelato sit for a few minutes before scooping to soften it and get a creamy texture.
- Use Add-Ins Carefully: You can add mix-ins for flavor and texture, but keep the milk-to-cream ratio in the base consistent. Changing this too much can affect the smoothness of the gelato.
Fun Flavors to Try Next
1. Classic Vanilla Bean: Use split vanilla beans to add rich vanilla flavor to your gelato. You’ll see lovely black specks that show it’s made with real ingredients.
2. Cinnamon Swirl: Add 1 teaspoon of ground cinnamon and a pinch of nutmeg to the base at the start, along with the vanilla. This creates a warm and spicy gelato.
3. Rich Chocolate: Mix ¼ cup of unsweetened cocoa powder into your milk and cream before adding 1 cup of sugar. This ensures a sweet, deep chocolate flavor.
4. Pistachio Delight: Blend ½ cup of shelled, roasted pistachios into a paste and mix it into the base with the full amount of sugar. A little almond extract enhances the pistachio taste for a gourmet treat.
5. Strawberry Swirl: Cook 1 cup of chopped strawberries with 2 tablespoons of sugar over low heat for 5 minutes until thick. Let it cool, then swirl it into your gelato during the last minute of churning for a marbled look.
Best Ways to Serve Cuisinart Ice Cream Maker Gelato
To make the most of your gelato, serve it in a crisp, freshly-made waffle cone or alongside a crunchy cookie. The crunch pairs well with the gelato’s smooth texture, making each bite enjoyable.
To boost the flavors, drizzle warm caramel or fruit sauce on top. This adds sweetness without overpowering the delicate vanilla flavor. For a light touch, garnish with fresh berries or ripe peach slices. Their natural sweetness and tang balance the richness of the gelato.
For a unique dessert idea, try an affogato. Just pour hot espresso over a scoop of gelato. The warm coffee pairs well with the cold gelato, creating a tasty contrast of flavors and temperatures.
How to Store and Make It Ahead
To keep your homemade gelato fresh, store it in an airtight container in the freezer. Place plastic wrap directly against the surface to prevent ice crystals from forming and keep the texture smooth.
The gelato will stay fresh for up to two weeks, but it tastes best within the first week. If you want to prepare in advance, you can make the base mixture up to two days ahead. Just keep it covered in the fridge until you’re ready to churn. This makes it easy to enjoy delicious gelato on busy days.
Common Questions, Answered
1. Can I make this without an ice cream maker?
Yes. Pour the chilled mixture into a shallow metal pan and place it in the freezer. Every 30 minutes, stir hard with a fork to break up ice crystals. Repeat this for about 3-4 hours until it reaches a scoopable texture.
2. Can I swap the sugar for honey or maple syrup?
Yes. Use ¾ cup of either in place of the 1 cup of sugar. Both add moisture so that the gelato will soften a bit faster once out of the freezer.
3. My gelato turned out icy. What went wrong?
This happens when the base wasn’t chilled long enough before churning, or when the container wasn’t sealed tightly during freezing. Chill the base for a full 2 hours next time and press plastic wrap directly on the surface before sealing the lid.
4. How do I soften gelato that got too hard?
Let it sit at room temperature for 10-15 minutes or microwave it in 10-second bursts, checking often so it does not melt.
5. Can I double this recipe?
Yes, but most home ice cream makers hold about 1.5 quarts at a time. You may need to churn it in two batches instead of doubling everything at once.
6. Can I use a different type of milk?
Yes. Swap the whole milk for 2 ¾ cups of oat milk, almond milk, or soy milk for a dairy-free version. The texture will be slightly less creamy since plant milks have less fat than whole milk.
7. How long should I chill the base before churning?
At least 2 hours, though overnight works even better. A cold base churns faster and comes out smoother.

Cuisinart Ice Cream Maker Gelato Recipe
Make a creamy Cuisinart Ice Cream Maker Gelato Recipe at home with real vanilla, easy steps, and fun flavor ideas to try.
Ingredients
- 2 ¾ cups whole milk
- 1 ¼ cups heavy cream
- 1 cup granulated sugar
- 2 vanilla beans, split lengthwise and seeds scraped out (or 2 tablespoons pure vanilla extract)
- ¼ teaspoon salt
Instructions
- Mix the Base: Combine milk and heavy cream in a mixing bowl. Add sugar, vanilla bean seeds (or vanilla extract), and salt. Whisk for about 2 minutes until the sugar dissolves completely. You shouldn't feel any grit when you rub a little between your fingers.
- Chill It Cold: Cover the bowl and refrigerate for at least 2 hours, or overnight. A cold base churns better and makes smoother gelato. Skipping this step can lead to icy gelato.
- Churn in the Ice Cream Maker: Ensure your Cuisinart freezer bowl has been in the freezer for 16-24 hours before you start. Pour the chilled mixture into the machine and churn for about 20-25 minutes, following the machine's instructions. The gelato is ready when it looks soft-serve and can hold its shape.
- Add Mix-Ins (Optional): If you want to add chocolate chips, chopped nuts, cookie pieces, or fruit swirls, add them in the last 3-5 minutes of churning. This helps spread them evenly without breaking them into small pieces.
- Freeze to Firm Up: Scoop the gelato into a freezer-safe container. Press a piece of parchment paper or plastic wrap onto the surface before closing the lid. This prevents ice crystals from forming on top. Freeze for at least 2 hours before serving.
- Scoop and Serve: Let the container sit at room temperature for 5-10 minutes before scooping. This softens it enough for easy scooping without turning it into soup. A warm spoon dipped in hot water also helps to scoop through firm gelato.
Nutrition Information:
Serving Size: 1Amount Per Serving: Calories: 270
This Cuisinart Ice Cream Maker Gelato Recipe yields a rich, creamy dessert with just a few ingredients and a bit of patience.
Once you master the base, trying new flavors like chocolate, pistachio, or strawberry becomes a fun weekend project. Grab your ice cream maker, chill the base overnight, and try one of these flavors this week.