Cuisinart Ice Cream Maker Raspberry Sorbet Recipe
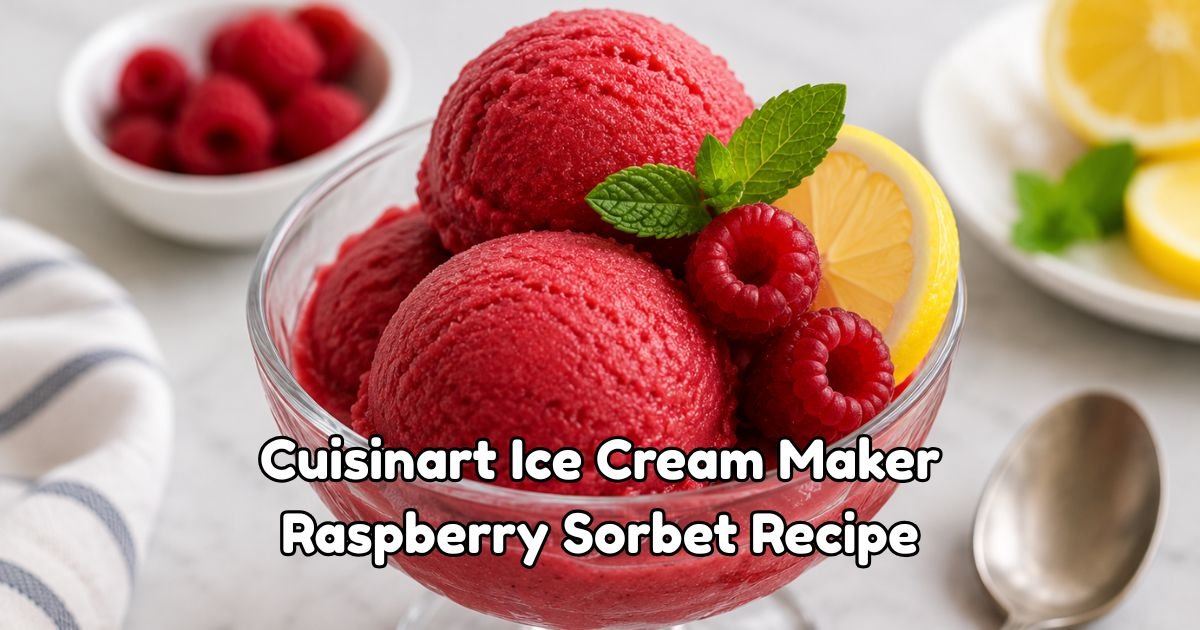
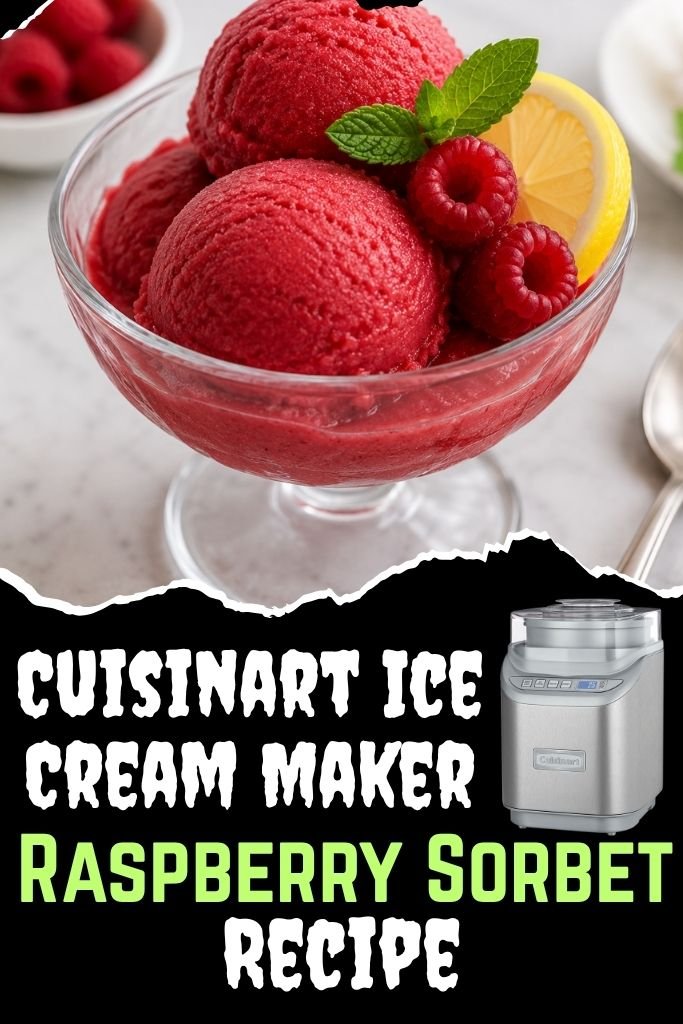
The Cuisinart Ice Cream Maker Raspberry Sorbet Recipe is where my summer sorbet season starts. A raspberry bush in my backyard supplies the berries, and I pick them the same day.
I have served this sorbet at dinner parties and backyard barbecues for years. Most home batches freeze into a solid block, or stay soupy because the bowl was not cold enough.
Cuisinart freezer-bowl machines share one habit. The bowl waits in the freezer, then churns a batch in 20 to 30 minutes.
Why Homemade Raspberry Sorbet Turns Icy
Icy sorbet is the top complaint. Large ice crystals form when the base freezes slowly. A freezer bowl that is only half frozen is the usual cause.
Most Cuisinart freezer bowls need 12 to 24 hours in the freezer, depending on the model. I check mine by shaking it. A fully frozen bowl makes no sloshing sound.
Sugar is the second fix. One full cup in this batch keeps part of the water from locking into hard ice, so the sorbet stays scoopable.
This sorbet has no dairy and no eggs, so there is no custard to cook. Everything goes from bowl to blender to machine.
Seeds or No Seeds: Who Should Strain This Sorbet
Raspberry seeds split opinion. Purists strain them for a silky scoop. I leave them in, because the tiny crunch tells me the berries came straight off my own bush.
Strain the puree through a fine sieve when serving young kids or guests with dental work. Seeds catch in teeth and annoy picky eaters.
This is a sugar-heavy dessert, with 1 cup of sugar spread over six servings. Anyone tracking sugar should serve smaller scoops.
Skip this recipe when the freezer has no spare shelf. The bowl needs a spot for 12 to 24 hours before churning.
Ingredients Cuisinart Ice Cream Maker Raspberry Sorbet
Raspberries (2 cups): Raspberries supply the flavor and color, plus the juice that thins the base. Fresh ones from my backyard bush are best. Driscoll’s work from the store. Pick plump, deep red berries with no mold.
Frozen berries work in place of fresh. Thaw them and pat them dry with a paper towel to remove excess moisture. Dole frozen raspberries are my pick when the bush is bare.
Granulated sugar (1 cup): Sugar does more than sweeten. It lowers the freezing point, which keeps the sorbet scoopable instead of icy. Domino is the bag in my pantry. Measure with a dry cup and level it off.
Honey works in place of part of the sugar. Swap ¼ cup of sugar for 3 tablespoons honey for a softer scoop and a floral note. Sugar-free sweeteners freeze harder.
Lemon juice (2 tablespoons): Lemon adds the acid that sharpens the berry flavor and balances the sugar. Half a large lemon yields about this much. Fresh is my default, but Santa Cruz Organic bottled juice works too.
Stir it in well so the acid spreads evenly through the base. Bottled juice loses some brightness in processing, so add a scant extra teaspoon.
Water (1 cup): Water thins the thick puree so it flows into the machine and freezes in fine crystals. Cold tap water works. I use filtered water from the refrigerator pitcher.
Ice water starts the base colder, which helps the bowl do its job. Measure it exactly. Extra water dilutes the red color and leaves more ice.
Tools I Recommend for This Recipe
- Cuisinart ice cream maker: Churns the base smooth
- Blender or food processor: Purees berries and lemon
- Measuring cups and spoons: Keeps the ratio exact
- Spoon and spatula: Stirs and scrapes the bowl
- Airtight container: Holds sorbet while it firms
How to Make Cuisinart Ice Cream Maker Raspberry Sorbet
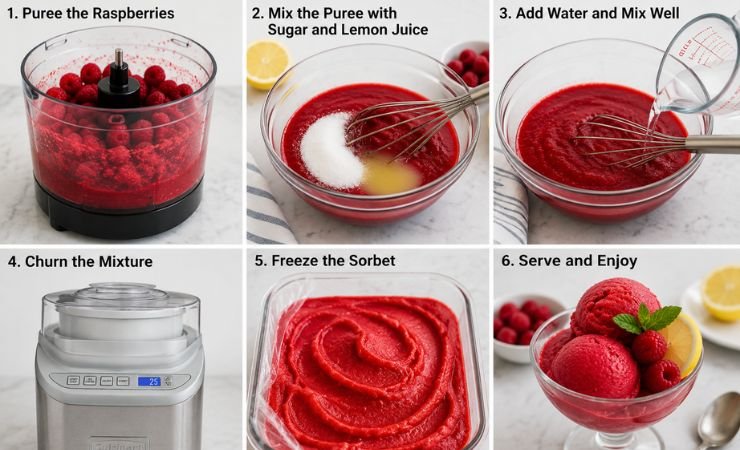
1. Puree the Raspberries: To start, puree the raspberries in a blender or food processor to release their natural juices and flavor. Add the raspberries to the blender and blend until smooth, scraping down the sides of the bowl as needed.
You should end up with a beautiful, vibrant puree that’s just bursting with flavor.
2. Mix the Puree with Sugar and Lemon Juice: Next, mix the raspberry puree with sugar and lemon juice to balance the flavors and add sweetness and acidity. Combine the puree, sugar, and lemon juice in a bowl and stir until the sugar dissolves.
You can taste the mixture as you go and adjust the sweetness and acidity to your liking.
3. Add Water and Mix Well: Now it’s time to add the water to the mixture to thin it out and give the sorbet a smooth, creamy texture. Simply add the water to the bowl and stir until it’s fully incorporated.
You should end up with a beautiful, smooth mixture that’s just perfect for churning.
4. Churn the Mixture: Now it’s time to churn the mixture in the Cuisinart ice cream maker, which will help to give the sorbet a smooth, creamy texture and a beautiful, even consistency.
Simply add the mixture to the ice cream maker and churn according to the manufacturer’s instructions.
You should end up with a beautiful, creamy sorbet that’s just perfect for serving.
5. Freeze the Sorbet: Once the sorbet has finished churning, transfer it to an airtight container and freeze until solid, which will help to set the texture and give the sorbet a beautiful, smooth consistency.
Scoop the sorbet into the container and cover it with plastic wrap or aluminum foil. You can also add a layer of parchment paper on top to prevent ice crystals from forming.
6. Serve and Enjoy: Finally, it’s time to serve and enjoy your delicious homemade sorbet! You can scoop it into bowls and serve it as is, or add a few toppings, such as fresh fruit, whipped cream, or granola.
The possibilities are endless, and I’m sure you’ll find that this sorbet is just perfect for hot summer days.
Tips, Tricks, and Common Mistakes to Avoid
1. Soupy Base in the Machine: Chill the mixed base in the refrigerator for 30 minutes first. A cold base freezes faster against the frozen bowl.
2. Bland After Freezing: Cold dulls sweetness. The base should taste a touch sweeter than you want the finished sorbet.
3. Pale Foam on Top: Blended puree can foam. Skim it off with a spoon before churning.
4. Bowl Won’t Hold Cold: Store the freezer bowl at the back of the freezer, inside a plastic bag, to keep frost off.
5. Bowl Frosts Unevenly: Dry the bowl completely before it goes in. A wet bowl should never go in the freezer.
6. Dull Color: Pale berries make a pink sorbet. Add a scant teaspoon of lemon juice to brighten the red.
How I Customize This Cuisinart Ice Cream Maker Raspberry Sorbet
Raspberry-Lemon: Add 1 extra tablespoon of lemon juice to the base. The sharper acid cuts through the sugar. I scoop it between courses at dinner parties.
Raspberry-Basil: Muddle 4 or 5 fresh basil leaves into the sugared berries in step 1. Basil adds a peppery, herbal edge. It suits backyard barbecue dinners.
Raspberry-Mint: Blend 2 sprigs of fresh mint into the puree. The mint adds a cool note that works on hot evenings. I serve it with shortbread.
Raspberry-Honey: Replace ¼ cup of the sugar with 3 tablespoons honey. Honey softens the tartness and keeps the scoop a little looser. I serve it at breakfast with granola.
Raspberry-Peach: Replace ½ cup of the berries with diced ripe peach. Peach rounds off the sharp edge. A spoonful of whipped cream finishes it.
What to Serve With This
Shortbread or thin wafers give the soft scoop something to snap against. Their buttery bite also soaks up any melted raspberry juice left in the bowl. Pick plain shortbread, since flavored cookies compete with the berries.
A tall glass of sparkling water or lemonade cuts the sweetness between spoonfuls. Sliced peaches or a handful of fresh berries add natural sweetness, so the plate needs no extra sugar.
For a lighter finish, serve one small scoop as a palate cleanser between courses. A spoonful of whipped cream adds richness, and a sprinkle of granola adds crunch for a bigger dessert.
At backyard barbecues, I plate it right after grilled corn and burgers. For a different morning, a scoop beside fresh fruit and granola works as breakfast.
Storage Tips
Keep the sorbet in an airtight container in the freezer for up to 2 months. Press parchment onto the surface before sealing. The texture is best in the first 2 weeks, so write the date on the lid.
Do not store it in the refrigerator. The sorbet melts there and turns into a watery puree that will not refreeze smoothly.
Frozen sorbet turns hard. Set the container on the counter for 10 to 15 minutes before scooping. Longer than that and the edges slump into soup, especially on a warm day.
Cuisinart Ice Cream Maker Raspberry Sorbet Recipe FAQs
1. Can I cut back on the sugar?
Less sugar freezes harder, because sugar keeps part of the water liquid. Trim no more than 2 tablespoons and expect a firmer scoop. Taste the base first, since cold dulls sweetness.
2. Can I make the base a day ahead?
Yes. Cover the mixed base and refrigerate it for up to 24 hours. Stir it well before pouring it into the machine, since the puree settles and the sugar sinks.
3. Can I wash the freezer bowl in the dishwasher?
No. Wash it by hand with warm soapy water. Dry it completely, since a wet bowl should never go back in the freezer. A damp bowl freezes unevenly and churns poorly.
4. Can I fold in fruit or nuts?
Yes. Fold chopped fruit or nuts into the soft sorbet right after churning, just before it goes into the container. Adding them earlier lets the paddle chop them up.
5. Does it work in other Cuisinart models?
It works in freezer-bowl models and self-freezing models. Self-freezing machines need no pre-freezing. Follow the churn time in your manual either way, since models vary.
6. Can I use another berry?
Blackberries swap in cup for cup and give a deeper color with more seeds. Strawberries hold more water, so the base comes out looser and needs a longer freeze.
7. What container freezes sorbet best?
A shallow, lidded container freezes faster than a deep tub, so the center firms evenly. A loaf pan lined with parchment works well, with a second sheet pressed on top.

Cuisinart Ice Cream Maker Raspberry Sorbet Recipe
Make delicious homemade raspberry sorbet with the Cuisinart Ice Cream Maker Raspberry Sorbet Recipe, perfect for hot summer days and easy to customize with different flavors and
Ingredients
- 2 cups Raspberries
- 1 cup Granulated sugar
- 2 tablespoons Lemon juice
- 1 cup Water
Instructions
- Puree the Raspberries: To start, puree the raspberries in a blender or food processor to release their natural juices and flavor. Add the raspberries to the blender and blend until smooth, scraping down the sides of the bowl as needed. You should end up with a beautiful, vibrant puree that's just bursting with flavor.
- Mix the Puree with Sugar and Lemon Juice: Next, mix the raspberry puree with sugar and lemon juice to balance the flavors and add sweetness and acidity. Combine the puree, sugar, and lemon juice in a bowl and stir until the sugar dissolves. You can taste the mixture as you go and adjust the sweetness and acidity to your liking.
- Add Water and Mix Well: Now it's time to add the water to the mixture to thin it out and give the sorbet a smooth, creamy texture. Simply add the water to the bowl and stir until it's fully incorporated. You should end up with a beautiful, smooth mixture that's just perfect for churning.
- Churn the Mixture: Now it's time to churn the mixture in the Cuisinart ice cream maker, which will help to give the sorbet a smooth, creamy texture and a beautiful, even consistency. Simply add the mixture to the ice cream maker and churn according to the manufacturer's instructions. You should end up with a beautiful, creamy sorbet that's just perfect for serving.
- Freeze the Sorbet: Once the sorbet has finished churning, transfer it to an airtight container and freeze until solid, which will help to set the texture and give the sorbet a beautiful, smooth consistency. Scoop the sorbet into the container and cover it with plastic wrap or aluminum foil. You can also add a layer of parchment paper on top to prevent ice crystals from forming.
- Serve and Enjoy: Finally, it's time to serve and enjoy your delicious homemade sorbet! You can scoop it into bowls and serve it as is, or add a few toppings, such as fresh fruit, whipped cream, or granola. The possibilities are endless, and I'm sure you'll find that this sorbet is just perfect for hot summer days.
Nutrition Information:
Serving Size: 1Amount Per Serving: Calories: 120
Serve it straight from the machine, or freeze it for 2 hours and scoop it firm. The sharp berry tang and the cold, even scoop are what guests mention first.