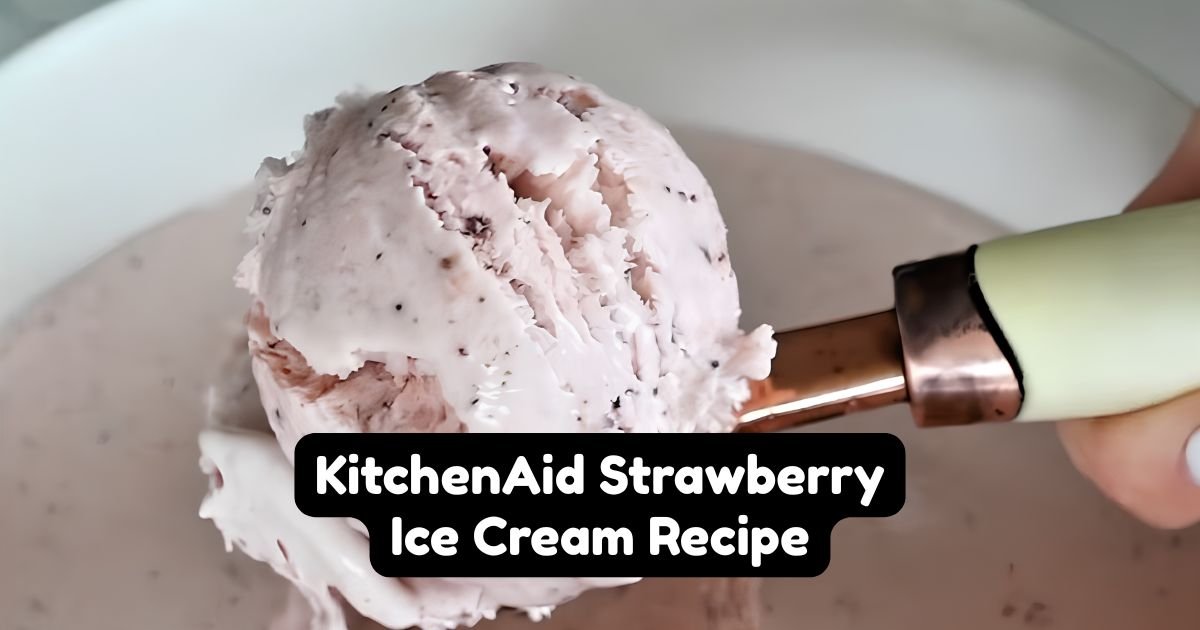
KitchenAid Strawberry Ice Cream Recipe
I often buy strawberries even when I have plenty at home. When I pick up my daughter from school, I pass a garden store with bright red strawberries on display, and they always catch my eye. It feels like they are calling me.
The issue is that I usually come home with more strawberries than we can eat before they go bad. Last year, I froze half of them because I didn’t want to waste good fruit, but I found those berries forgotten in the freezer the next spring.
This year, I decided to use the extra strawberries instead of letting them get lost in the back of the freezer. One day, I saw a KitchenAid ad on YouTube, and it inspired me to try a KitchenAid Strawberry Ice Cream Recipe.
I took out all the strawberries I had, made a batch, and was excited about how easy it was to turn those extra berries into something my family wanted to eat. Now there are no more wasted strawberries, and my daughter has been asking me to make it again and again since June.
Whenever we have leftover strawberries, I know exactly what to make.

Why Cooking the Strawberries Makes Better Ice Cream
Fresh strawberries contain a lot of water. This is why when you mix raw berries directly into ice cream, they often freeze into hard chunks instead of staying soft.
Cooking the berries into a sauce first removes some of that water and makes the flavor stronger. The result is a thicker, jam-like consistency instead of a watery one.
This thicker sauce mixes better into the ice cream and doesn’t settle at the bottom as uncooked fruit does. Although it’s an extra step, it is essential for improving the final texture.
Ingredients for KitchenAid Strawberry Ice Cream
- 1 pound fresh strawberries, hulled and diced: Use fresh strawberries to create the main flavor of the ice cream. Cook them down into a jammy sauce and swirl that through the base. Look for deep red berries for the best taste. Use a paring knife to hull them instead of a dedicated huller, which works fine for one pound.
- ¼ cup honey: Honey adds sweetness and a light floral note that plain sugar can’t provide. Use a mild honey, like clover, so it doesn’t overpower the strawberries. Local honey is a good choice if available.
- 1 cup granulated sugar: This sugar sweetens both the strawberry sauce and the cream base. It helps keep the finished ice cream scoopable instead of rock hard. Plain white sugar dissolves well in both hot sauce and cold cream.
- ¼ teaspoon ground cinnamon: Cinnamon adds a warm note that enhances the sweetness of the strawberries without standing out. A small jar from the spice aisle is enough. You can skip it if you want the flavor to be purely fruity.
- Juice of 1 medium lemon: Lemon juice brightens the strawberry sauce and prevents the sweetness from being too flat. Fresh lemon juice offers a cleaner taste than bottled juice. Squeeze it into the pot while cooking, and strain out any seeds.
- ½ cup chocolate chips, roughly chopped: Chocolate chips create bursts of flavor in the finished ice cream. Use Ghirardelli semi-sweet chips because they hold their shape when frozen. Chop them smaller to spread them evenly in each scoop.
- 2 cups heavy cream: Heavy cream gives the ice cream its rich and creamy texture. More fat here results in a smoother, less icy final product. Keep it in the fridge until you mix, so it blends better with the other ingredients.
- 1 cup half-and-half: Half-and-half adds richness without making the ice cream too heavy. Any standard store brand is fine. Shake the carton before measuring since it can separate during storage.
- ½ teaspoon vanilla extract: Vanilla extract adds a warm background flavor. Use pure vanilla for a fuller taste. Add it to the cream mixture before chilling to help it distribute evenly.
Kitchen Tools for Making Strawberry Ice Cream
- KitchenAid stand mixer with ice cream attachment: churns the ice cream smooth
- Medium saucepan: cooks the strawberry sauce
- Strainer: removes seeds from the juice
- Measuring cups and spoons: measures ingredients accurately
- Whisk: blends the cream base smooth
- Wooden spoon: stirs the sauce while cooking
How to Make KitchenAid Strawberry Ice Cream
1. Freeze the Ice Cream Bowl: Place the KitchenAid ice cream bowl in the freezer for at least 15 hours before churning the ice cream. It’s best to freeze it the night before. Make sure it is completely frozen, and nothing moves when you gently tilt it.
2. Make the Strawberry Sauce: In a medium saucepan, combine the diced strawberries, honey, ½ cup of sugar, cinnamon, and lemon juice. Cook over medium-low heat for 10 to 15 minutes, stirring occasionally, until the strawberries break down and the mixture thickens like jam. The sauce is ready when it coats the back of a spoon and reduces by about half.
3. Cool the Sauce: Remove the sauce from heat and let it cool to room temperature. Then, refrigerate it until fully chilled. Avoid adding warm sauce to the cream base later, as this can cause separation.
4. Mix the Cream Base: In a large bowl, whisk together the heavy cream, half-and-half, the remaining ½ cup of sugar, and vanilla extract. Keep whisking until the sugar dissolves and the mixture is smooth. Refrigerate this base until it is fully chilled, for at least one hour.
5. Churn the Ice Cream: Attach the ice cream bowl to the stand mixer and pour in the chilled cream base. Churn for 20 to 25 minutes until it thickens to a soft-serve consistency. If it is still thin after 25 minutes, the bowl may not be frozen enough. In this case, transfer the mixture to the freezer and stir every 30 minutes until it firms up.
6. Add Strawberry Sauce and Chocolate Chips: During the last few minutes of churning, pour in the chilled strawberry sauce and add the chopped chocolate chips. Run the machine just long enough to swirl everything together, so you can still see streaks of sauce.
7. Freeze Until Firm: Move the churned ice cream to a freezer-safe container and freeze for at least 2 hours for a firmer texture. Alternatively, you can serve it right away for a softer, soft-serve consistency.
My Best Tips for Smooth Strawberry Ice Cream
- Icy Ice Cream: If your ice cream is icy instead of creamy, it means the cream base wasn’t chilled long enough. Chill it in the fridge for a full hour before churning.
- Disappearing Strawberry Swirl: If the strawberry swirl mixes into the ice cream instead of staying visible, you probably added it too early. Pour it in during the last minute or two of churning.
- Too Tart Sauce: If your sauce tastes too tart, you may have used too much lemon juice. Taste the sauce before chilling, and add a little more honey if it needs sweetness.
- Ice Cream Not Thickening: If the ice cream doesn’t thicken in the machine, the bowl might not be frozen enough. Make sure it has been in the freezer for a full 15 hours.
- Chocolate Chips Sinking: If the chocolate chips sink to the bottom, you likely added them while the mixture was too soft. Wait until the ice cream is close to soft-serve consistency before folding them in.
- Rock Hard Ice Cream: If the ice cream becomes rock hard in storage, you might have cut back too much on sugar. Sugar helps keep the texture scoopable, so stick to the amount in the recipe.
KitchenAid Strawberry Ice Cream Variations I Try
1. Strawberry Cheesecake Ice Cream: Swirl in a mixture of softened cream cheese, a few tablespoons of sugar, and a splash of vanilla during the last minute of churning. The tang of the cream cheese plays well against the sweet strawberry sauce.
2. Double Chocolate Strawberry Ice Cream: Whisk 2 tablespoons of cocoa powder into the cream base before chilling, in addition to the chocolate chips already in the recipe. This version tastes closer to a chocolate-covered strawberry than a plain strawberry ice cream.
3. Strawberry Banana Ice Cream: Mash a ripe banana and stir it into the strawberry sauce while it’s still warm. The banana adds extra sweetness and a slightly different texture to the swirl.
4. Strawberry Basil Ice Cream: Steep a few torn basil leaves in the warm strawberry sauce for 10 minutes, then strain them out before chilling. The basil adds an unexpected, slightly peppery note that plays well against the sweetness.
5. Strawberry Sorbet Version: Skip the cream base entirely and use only the strawberry sauce, thinned with a bit of water, for a dairy-free, fruit-forward version. This one churns faster than the full ice cream, usually in about 15 minutes.
What to Serve With Strawberry Ice Cream
This ice cream is tasty on its own in a bowl or cone, but it also works well with other desserts. You can enjoy it with warm shortcake or pound cake, letting it melt slightly into the cake. Adding a scoop on top of waffles or pancakes turns them into a dessert instead of breakfast.
Fresh berries on top brighten the dish without competing with the strawberry flavor. A drizzle of chocolate or caramel sauce enhances the chocolate chips mixed in.
For a fun summer dessert spread, bake shortcake, whip some fresh cream, and offer this ice cream so everyone can create their own bowl.
This combination includes something warm, something creamy, and something fruity, using ingredients that are easy to find in summer.
How to Store Homemade Strawberry Ice Cream
Store the ice cream in a freezer-safe container with a tight lid for up to 2 weeks. Press plastic wrap against the surface before sealing to help reduce ice crystals. The texture stays good during that time, but it will get harder the longer it’s in the freezer.
If it has been there for more than a day or two, let it sit at room temperature for 5 to 10 minutes before scooping. If it’s too hard to scoop, run warm water over the outside of the container for a few seconds to soften the edges.
Avoid letting the ice cream melt completely and then refreezing it, as this will make it icy and grainy. Store the container at the back of the freezer, not the door, where the temperature changes more often.
Frequently Asked Questions
1. How Can I Keep Chocolate Chips From Sinking?
Add the chocolate chips during the last minute or two of churning, when the mixture is almost at a soft-serve consistency. If you add them too early, they will settle before the ice cream sets.
2. Can I Make This Without an Ice Cream Maker?
Yes, pour the chilled mixture into a shallow container and freeze it. Stir every 30 minutes for the first few hours to break up ice crystals. Mix in the strawberry sauce and chocolate chips partway through instead of at the beginning.
3. How Long Does Homemade Strawberry Ice Cream Take?
From making the sauce to chilling, churning, and freezing, expect it to take about 4 to 5 hours in total. Most of that time is just waiting, while active prep takes about 30 minutes.
4. Can I Make This Ice Cream Dairy-Free?
Yes, replace the heavy cream and half-and-half with full-fat coconut cream and coconut milk. The texture will be similar, but it will have a slight coconut flavor.
5. Why Does My Ice Cream Taste More Like Cream Than Strawberry?
This usually means the sauce did not mix well or there wasn’t enough in each scoop. Make sure the sauce is evenly spread throughout the container, not just in one spot.

KitchenAid Strawberry Ice Cream Recipe
Make this KitchenAid Strawberry Ice Cream Recipe with cooked strawberries, cream, chocolate chips, and vanilla for a rich homemade summer dessert.
Ingredients
- 1 pound fresh strawberries, hulled and diced
- ¼ cup honey
- 1 cup granulated sugar
- ¼ teaspoon ground cinnamon
- Juice of 1 medium lemon
- ½ cup chocolate chips, roughly chopped
- 2 cups heavy cream
- 1 cup half-and-half
- ½ teaspoon vanilla extract
Instructions
- Freeze the Ice Cream Bowl: Place the KitchenAid ice cream bowl in the freezer for at least 15 hours before churning the ice cream. It’s best to freeze it the night before. Make sure it is completely frozen, and nothing moves when you gently tilt it.
- Make the Strawberry Sauce: In a medium saucepan, combine the diced strawberries, honey, ½ cup of sugar, cinnamon, and lemon juice. Cook over medium-low heat for 10 to 15 minutes, stirring occasionally, until the strawberries break down and the mixture thickens like jam. The sauce is ready when it coats the back of a spoon and reduces by about half.
- Cool the Sauce: Remove the sauce from heat and let it cool to room temperature. Then, refrigerate it until fully chilled. Avoid adding warm sauce to the cream base later, as this can cause separation.
- Mix the Cream Base: In a large bowl, whisk together the heavy cream, half-and-half, the remaining ½ cup of sugar, and vanilla extract. Keep whisking until the sugar dissolves and the mixture is smooth. Refrigerate this base until it is fully chilled, for at least one hour.
- Churn the Ice Cream: Attach the ice cream bowl to the stand mixer and pour in the chilled cream base. Churn for 20 to 25 minutes until it thickens to a soft-serve consistency. If it is still thin after 25 minutes, the bowl may not be frozen enough. In this case, transfer the mixture to the freezer and stir every 30 minutes until it firms up.
- Add Strawberry Sauce and Chocolate Chips: During the last few minutes of churning, pour in the chilled strawberry sauce and add the chopped chocolate chips. Run the machine just long enough to swirl everything together, so you can still see streaks of sauce.
- Freeze Until Firm: Move the churned ice cream to a freezer-safe container and freeze for at least 2 hours for a firmer texture. Alternatively, you can serve it right away for a softer, soft-serve consistency.
Nutrition Information:
Serving Size: 1Amount Per Serving: Calories: 390
The KitchenAid Strawberry Ice Cream Recipe showcases the real flavor of strawberries better than store-bought ice cream because the sauce is cooked just for this recipe.
The chocolate chips provide a nice contrast to the fruity taste. While chilling the sauce and cream base takes some time, the machine will finish the ice cream in under half an hour.