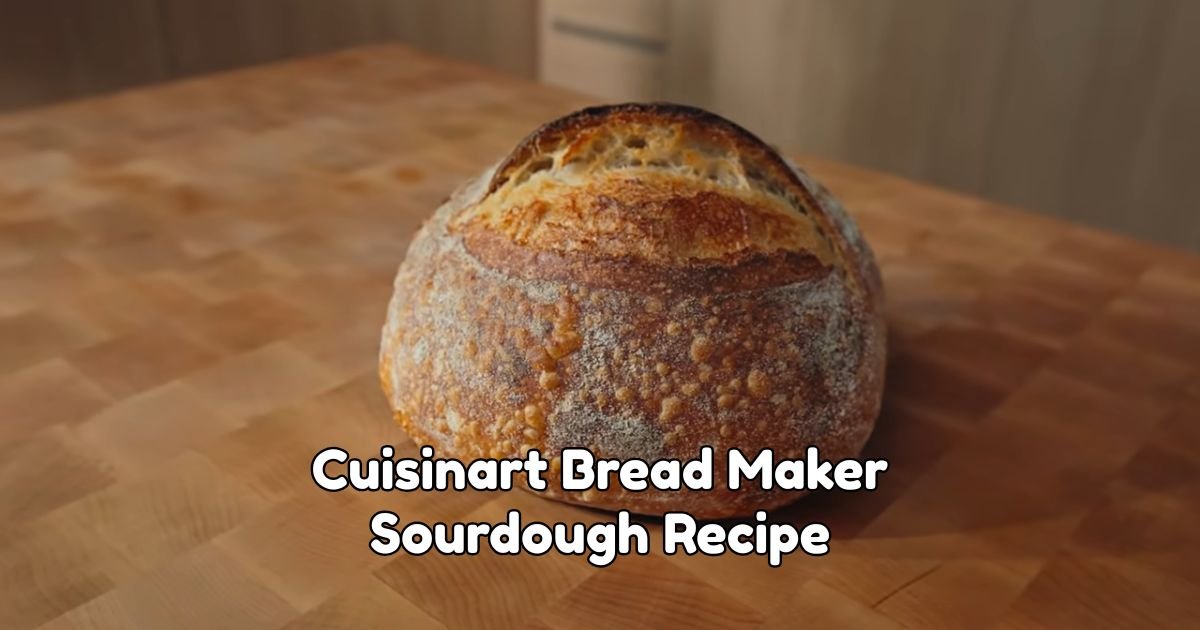
Cuisinart Bread Maker Sourdough Recipe
Making sourdough bread may seem difficult, but using a Cuisinart bread maker makes it much easier. This sourdough recipe is simple once you understand the steps. Sourdough is a classic bread known for its chewy inside, crispy crust, and slightly tangy flavor.
It has been around for thousands of years, and many people still love it. So, why do people enjoy sourdough so much? It has a rich flavor that store-bought bread can’t match.
The texture is both chewy and soft, and the smell while it bakes is amazing. It feels special, like something made with care, not an official Cuisinart recipe.
It is my own version, created and refined in my kitchen before I shared it here. I made sure it works before putting it out in the world, and it really does.
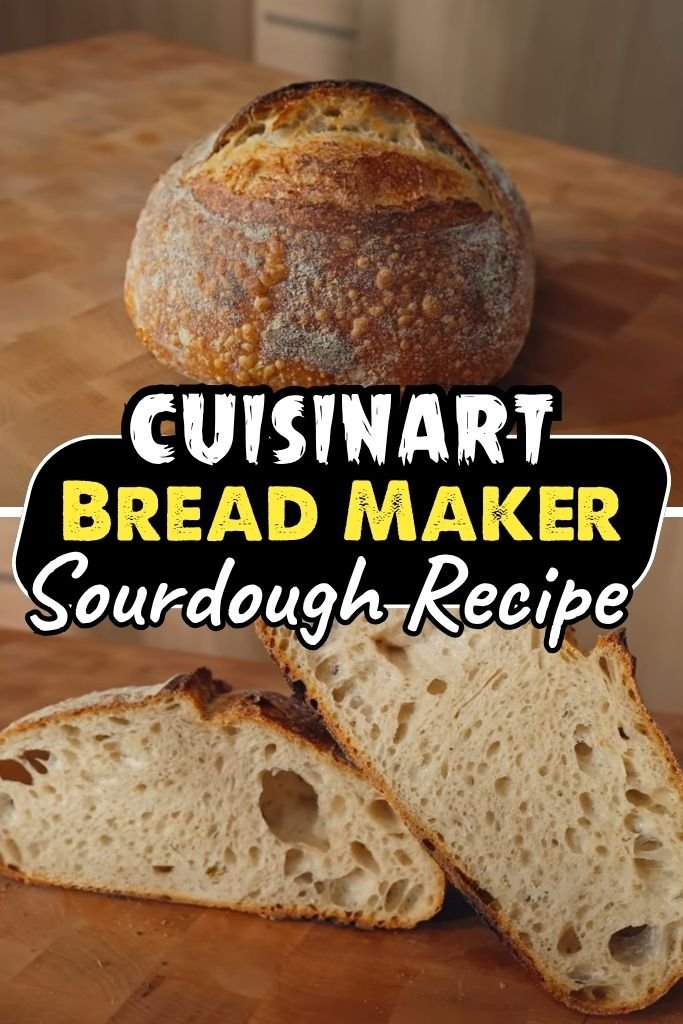
What Does Cuisinart Bread Maker Sourdough Actually Taste Like?
The flavor of sourdough made in a Cuisinart bread maker is something really special. You get that classic tangy kick that sourdough is known for, but it’s balanced out with a slightly sweet, nutty undertone from the flour. The crust comes out golden and a little crisp on the outside, while the inside stays soft, chewy, and airy.
Each slice has a hearty, wholesome taste that feels deeply satisfying. My personal experience with this bread is that it tastes even better the next day.
The tangy flavor deepens overnight, and the texture gets that perfect chew. It’s one of those breads that pairs well with almost anything: butter, jam, soup, or just on its own.
It doesn’t taste like the rubbery, bland loaves you find in supermarkets. It tastes real. Honest. Like bread is supposed to taste.
Ingredients You Need for This Sourdough Recipe
Active Sourdough Starter (1 cup): Your starter is crucial for this recipe. It needs to be active and bubbly before use. Feed it 4-8 hours before baking. A healthy starter should double in size and smell slightly tangy and yeasty. If you don’t have a starter, you can get one from a friend or buy a dried starter online and rehydrate it.
Bread Flour (3 cups): Use bread flour for its higher protein content, which helps create strong gluten needed for sourdough, giving the bread a chewy texture. You can also use all-purpose flour, but the bread will be less chewy. Whole wheat flour can replace up to 30% of the bread flour for a heartier flavor.
Warm Water (¾ cup): Water hydrates the dough and activates the starter. Use lukewarm water, about 78°F to 80°F (25°C to 27°C). If the water is too hot, it can harm the yeast. If it’s too cold, the dough won’t rise properly. Filtered water is best if your tap water has a lot of chlorine, as chlorine can slow fermentation.
Salt (1½ teaspoons): Salt controls fermentation and adds flavor. Without it, the bread will taste bland. Use fine sea salt or kosher salt. If using table salt, use a little less because it’s more concentrated.
Olive Oil (1 tablespoon) — Optional: Adding olive oil makes the crumb softer and adds flavor. It also keeps the crust from getting too hard. You can skip it for a more traditional crusty sourdough, or use melted butter for a richer taste.
Honey or Sugar (1 teaspoon) — Optional: A little honey feeds the wild yeast and adds mild sweetness to balance the tang. You can also use maple syrup as a natural sweetener.
Essential Kitchen Equipment for This Recipe
- Cuisinart Bread Maker: This is the main tool for the recipe; any model will work.
- Kitchen Scale: Use this for precise ingredient measurements.
- Measuring Cups and Spoons: These are for measuring liquids and small amounts of ingredients.
- Mixing Bowl: Use this to mix or check your starter.
- Rubber Spatula: This helps scrape the sides of the pan if needed.
- Plastic Wrap or Bowl Cover: This is useful during the proofing stage.
- Bread Knife: Use a serrated knife to slice the bread cleanly.
How to Make Sourdough Bread in a Cuisinart Bread Maker (Step by Step)
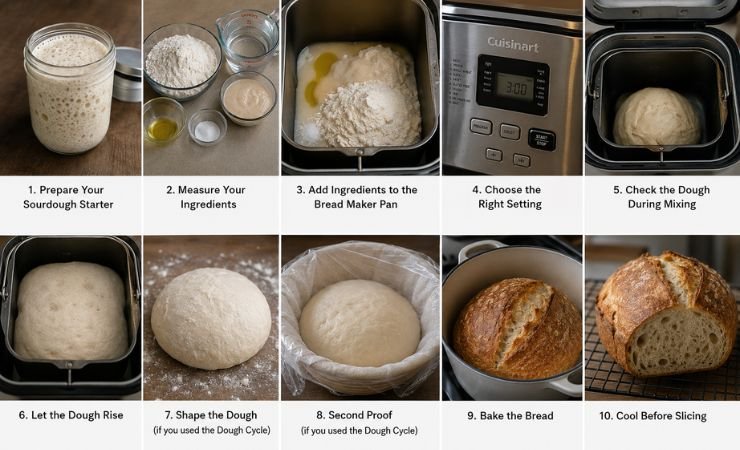
1. Prepare Your Sourdough Starter: Before you start, ensure your starter is active. Take it out of the fridge the night before or at least 4–8 hours before baking. Feed it equal parts flour and water by weight. Let it sit at room temperature until it’s bubbly, doubled in size, and floats when you drop a small spoonful into water.
2. Measure Your Ingredients: Measure everything before you start. For accuracy, use a kitchen scale, especially for flour and starter. Sourdough is sensitive, so precise measurements are important. Lay everything out on your counter.
3. Add Ingredients to the Bread Maker Pan: Add the ingredients to your Cuisinart bread maker pan in this order: warm water first, then sourdough starter, then olive oil and honey (if using), then bread flour, and finally salt. Keep the salt away from the starter until mixing to avoid slowing down yeast activity.
4. Choose the Right Setting: Place the pan inside your Cuisinart bread maker. Select the “Dough” cycle if you want to shape and proof it manually (recommended for best results). For a fully automatic option, use the “Basic” or “White Bread” cycle with a medium crust setting. The total time will be about 3–4 hours, depending on your model.
5. Check the Dough During Mixing: About 5–10 minutes into the mixing cycle, lift the lid to check the dough. It should pull away from the sides and form a smooth, slightly sticky ball. If it’s too dry and crumbly, add water one tablespoon at a time. If it’s too wet and not forming a ball, add flour one tablespoon at a time.
6. Let the Dough Rise: Once the machine finishes mixing and the first rise, your dough will have puffed up. If you use the “Dough” cycle, the machine will stop here. The dough should feel light and airy when you gently press it.
7. Shape the Dough (if you used the Dough Cycle): Lightly flour your hands and a clean surface. Remove the dough from the pan and shape it into a round or oval loaf. Be gentle to avoid deflating it. Place the shaped dough in a lightly oiled loaf pan or a floured proofing basket.
8. Second Proof (if you used the Dough Cycle): Cover the shaped dough with a damp cloth or plastic wrap. Let it proof at room temperature for 2–4 hours, or until noticeably puffed. For more flavor, place it in the fridge overnight for a slow proof, which enhances the sourdough taste.
9. Bake the Bread: If you use the dough cycle, preheat your oven to 450°F (232°C). Score the top of the dough with a sharp knife or bread lame with a few slashes about 1/2 inch deep. Bake for 20 minutes covered (use a Dutch oven or foil tent for steam), then uncover and bake for another 20–25 minutes until the crust is deep golden brown.
10. Cool Before Slicing: Once the bread is out of the oven or bread maker, let it cool on a wire rack for at least 1 hour before slicing. Cutting too soon will let steam escape and make the inside gummy. The bread continues to set as it cools, so be patient.
Tips, Tricks, and Mistakes to Avoid for a Perfect Loaf
Use an Active Starter: Make sure your starter is active and bubbling. If it’s not, your bread won’t rise properly. Always check with the float test first. A slow starter makes a dense, flat loaf.
Check Water Temperature: Water temperature is important for fermentation. Cold water slows it down, while hot water can kill the yeast. Keep the water temperature between 78°F and 80°F. A kitchen thermometer will help you get it right.
Don’t Over-Flour the Dough: Sourdough dough is meant to be a bit sticky. Adding too much flour makes it stiff, resulting in a dense loaf without an open crumb. Be patient and let the machine do its job.
Don’t Rush Proofing Time: Longer and slower proofing improves flavor. Sourdough gets better with time. If you hurry it, you’ll lose the delicious tang that makes sourdough special.
Score the Dough Before Baking: If you are baking the loaf after the dough cycle, make sure to score the top. Scoring helps the bread expand properly and prevents uneven cracks. Just a few slashes can make a big difference.
Let It Cool Completely: It’s tempting to cut hot bread, but this ruins its texture. Let the crumb set after baking. Wait at least one hour; two hours is even better.
Store It Right Away: Sourdough can dry out quickly. Once it cools, wrap it or place it in a bread bag to keep the crust from getting too hard.
Different Cooking Methods Worth Trying
Oven Bake After Dough Cycle: To make crusty, bakery-style sourdough, use the dough-only cycle on your Cuisinart bread maker and then finish baking in the oven. Place the dough in a Dutch oven to create steam during the first part of baking, which helps achieve a thick, crackly crust and an airy crumb that a bread maker alone might not produce.
Full Bread Maker Cycle: If you prefer a hands-off approach, use the full bake cycle on your Cuisinart bread maker. This results in a softer crust and a more even shape. It’s perfect for busy weekdays when you want fresh sourdough with little effort.
Cold Proof Method: After the dough cycle, shape your dough and place it in the fridge overnight instead of letting it sit at room temperature. Bake it directly from the fridge the next morning. This slow, cold fermentation gives the bread a deeper, tangy flavor and a nice open crumb.
What to Serve With Your Homemade Sourdough Bread
This bread makes every meal feel special. One of my favorite ways to enjoy it is by slicing it thick, spreading it with salted butter, and drizzling honey. It’s simple but very satisfying. This sourdough pairs well with many dishes. For a warm meal, try it with creamy tomato soup or French onion soup for dipping.
If you want something fresh, avocado slices with flaky salt and red pepper flakes are delicious. For a hearty breakfast, serve it with scrambled eggs and crispy bacon. If you’re looking for a snack, a smashed white bean dip with olive oil and herbs works great, or you can make a quick snack board with sharp cheddar cheese and apple slices.
You can also enjoy grilled chicken or a classic tuna salad sandwich on it. For a Mediterranean twist, pair it with hummus, roasted red peppers, and olives. And of course, a classic BLT with ripe summer tomatoes and good mayo is a tasty option.
How to Store, Freeze, and Reheat Your Sourdough
Store sourdough bread at room temperature rather than in the fridge. The fridge can dry it out and make it stale faster. Wrap the cooled loaf in beeswax wrap, a linen bag, or a large zip-lock bag, and keep it on the counter.
It will stay fresh for 3–4 days this way. You can also freeze sourdough easily. Slice the bread before freezing so you can take out only what you need. Wrap each slice in plastic wrap and place them in a freezer-safe bag. The bread stays good in the freezer for up to 3 months with little loss in quality.
You can prepare the dough until the shaping step and then put it in the fridge to rise slowly overnight. The next morning, bake it straight from the fridge. This method enhances the flavor and makes morning baking simple since most work is done the night before.
To heat frozen slices, place them directly in the toaster. For a whole frozen loaf or a day-old loaf, wrap it lightly in foil and warm it in a 350°F (175°C) oven for about 10–15 minutes. Remove the foil for the last 3–4 minutes to crisp up the crust.
Frequently Asked Questions About Cuisinart Bread Maker Sourdough
1. Can I use instant yeast with this sourdough recipe to help it rise faster?
You can add instant yeast, but it changes the bread. Real sourdough gets its rise and flavor from wild yeast in the starter. Adding commercial yeast will speed up the process but lessen the deep, tangy taste. For the best sourdough flavor, stick to just using the starter.
2. Why is my sourdough loaf coming out dense and not rising well?
The most common reason is an inactive starter. If the starter isn’t bubbly and active, it won’t leave the dough properly. Another reason might be water that was too hot during mixing, which can harm the wild yeast. Check your starter’s health first before trying other fixes.
3. How long does it take to bake sourdough in a Cuisinart bread maker from start to finish?
It varies based on the cycle you choose. The full automatic cycle takes about 3–4 hours from beginning to end. If you use the dough-only cycle plus oven baking, it adds another 3–5 hours, depending on your proofing time. An overnight cold proof means the total time stretches over two days, but you’ll still have short hands-on time.
4. Can I make sourdough in a Cuisinart bread maker without a dedicated sourdough setting?
Yes, you can. Many Cuisinart models don’t have a specific sourdough setting, and that’s perfectly fine. The “Basic,” “White Bread,” or “Dough” cycles work well. Sourdough needs a longer fermentation time, so using the dough cycle with an extra manual proof usually gives the best results.
5. What hydration level works best for a bread maker sourdough?
A hydration level of about 70–75% works really well in a Cuisinart bread maker. Very high hydration doughs (80%+) can be difficult for bread machines since the paddle struggles with very wet dough. Starting at 70–75% gives you a manageable dough that creates a nice open crumb.
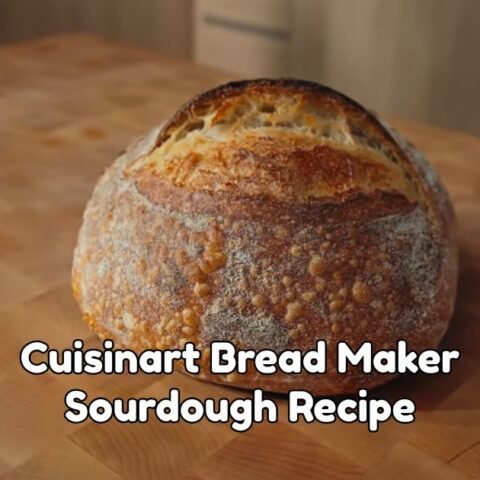
Cuisinart Bread Maker Sourdough Recipe
This Cuisinart Bread Maker Sourdough Recipe makes a tangy, chewy, golden loaf at home with simple ingredients and easy steps!
Ingredients
- 1 cup active sourdough starter, bubbly and fed
- 3 cups bread flour
- ¾ cup warm water (78 to 80 degrees Fahrenheit)
- 1 and ½ teaspoons fine sea salt or kosher salt
- 1 tablespoon olive oil (optional)
- 1 teaspoon honey or sugar (optional)
Instructions
- Prepare Your Sourdough Starter: Before you start, ensure your starter is active. Take it out of the fridge the night before or at least 4–8 hours before baking. Feed it equal parts flour and water by weight. Let it sit at room temperature until it's bubbly, doubled in size, and floats when you drop a small spoonful into water.
- Measure Your Ingredients: Measure everything before you start. For accuracy, use a kitchen scale, especially for flour and starter. Sourdough is sensitive, so precise measurements are important. Lay everything out on your counter.
- Add Ingredients to the Bread Maker Pan: Add the ingredients to your Cuisinart bread maker pan in this order: warm water first, then sourdough starter, then olive oil and honey (if using), then bread flour, and finally salt. Keep the salt away from the starter until mixing to avoid slowing down yeast activity.
- Choose the Right Setting: Place the pan inside your Cuisinart bread maker. Select the "Dough" cycle if you want to shape and proof it manually (recommended for best results). For a fully automatic option, use the "Basic" or "White Bread" cycle with a medium crust setting. The total time will be about 3–4 hours, depending on your model.
- Check the Dough During Mixing: About 5–10 minutes into the mixing cycle, lift the lid to check the dough. It should pull away from the sides and form a smooth, slightly sticky ball. If it's too dry and crumbly, add water one tablespoon at a time. If it's too wet and not forming a ball, add flour one tablespoon at a time.
- Let the Dough Rise: Once the machine finishes mixing and the first rise, your dough will have puffed up. If you use the "Dough" cycle, the machine will stop here. The dough should feel light and airy when you gently press it.
- Shape the Dough (if you used the Dough Cycle): Lightly flour your hands and a clean surface. Remove the dough from the pan and shape it into a round or oval loaf. Be gentle to avoid deflating it. Place the shaped dough in a lightly oiled loaf pan or a floured proofing basket.
- Second Proof (if you used the Dough Cycle): Cover the shaped dough with a damp cloth or plastic wrap. Let it proof at room temperature for 2–4 hours, or until noticeably puffed. For more flavor, place it in the fridge overnight for a slow proof, which enhances the sourdough taste.
- Bake the Bread: If you use the dough cycle, preheat your oven to 450°F (232°C). Score the top of the dough with a sharp knife or bread lame with a few slashes about 1/2 inch deep. Bake for 20 minutes covered (use a Dutch oven or foil tent for steam), then uncover and bake for another 20–25 minutes until the crust is deep golden brown.
- Cool Before Slicing: Once the bread is out of the oven or bread maker, let it cool on a wire rack for at least 1 hour before slicing. Cutting too soon will let steam escape and make the inside gummy. The bread continues to set as it cools, so be patient.
Nutrition Information:
Serving Size: 1Amount Per Serving: Calories: 150
This Cuisinart Bread Maker Sourdough Recipe shows that you can bake tasty sourdough without feeling stressed. With the right starter and some patience, you can make a beautiful loaf in your bread maker and enjoy every slice.
Try this recipe and leave a comment below. I’d love to know how it turned out for you and what you think!