Hough Bakery White Cake Recipe
The Hough Bakery White Cake Recipe is a popular dessert that many people enjoy making. This cake is known for its great texture and flavor. One important tip for making this cake is to use ingredients that are at room temperature. This helps create a soft and even crumb.
For a white cake, it’s essential to balance the richness of the ingredients with a light and airy texture. This cake is ideal for special occasions, but it’s also easy enough to make for a weekday treat. Its versatility allows for many flavors and decorations, making it a favorite among bakers of all skill levels.
Whether you’re an experienced baker or just starting, this cake will soon be a go-to recipe in your kitchen. Its classic flavor and soft texture make it a great choice for any event.
Why This Classic White Cake Is Worth Making From Scratch
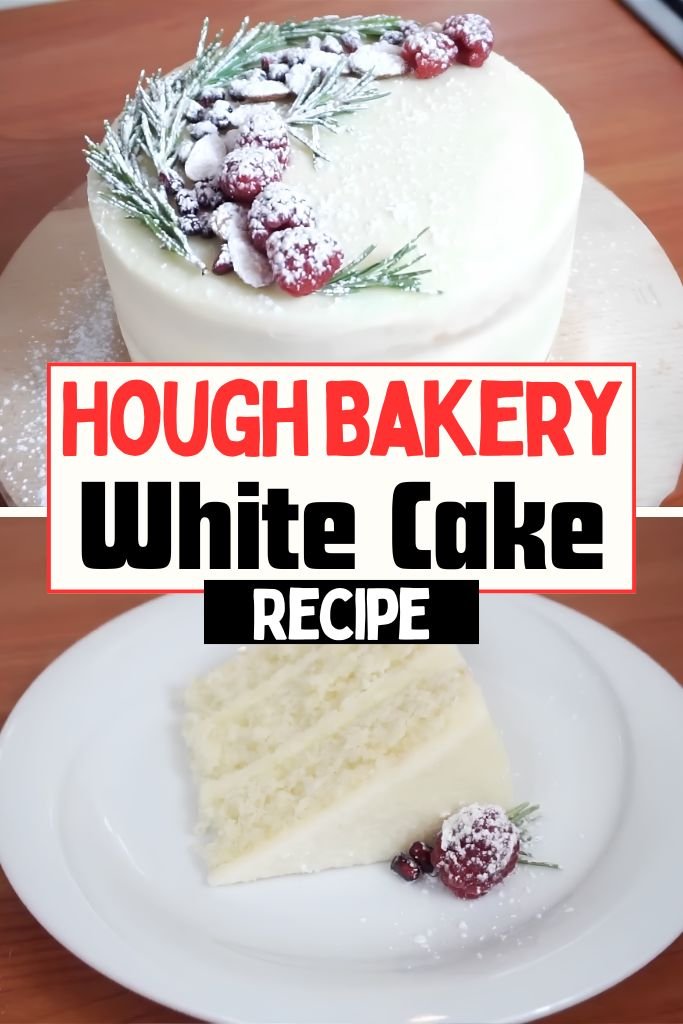
This cake has an amazing flavor and texture that you won’t forget. The soft crumb melts in your mouth, and the sweetness of the sugar combined with the richness of the butter makes it truly special.
You will enjoy making this cake because it is easy, even for beginners. The ingredients are simple and the steps are clear, making it a good choice for anyone wanting to try baking.
This cake is great for many occasions, like birthdays and anniversaries, or as a sweet treat to brighten your day. I love making this cake because it’s satisfying to see it come together. From mixing the ingredients to the final presentation, the whole process is rewarding.
What Sets This Bakery-Style Cake Apart
This cake is special because it has a balanced mix of ingredients. The all-purpose flour, granulated sugar, and unsalted butter come together to create great flavor and texture. Making this cake from scratch is worth it. You can choose high-quality ingredients and make a fresher product than any store-bought cake.
A key part of making this cake is the Maillard reaction. This is when the starches in the flour break down and caramelize, giving the cake a rich, golden-brown crust. The steps in this recipe are in a specific order to ensure each part is prepared and combined correctly.
If you skip a step, your cake might turn out dense, flat, or tasteless.
Ingredients for Hough Bakery White Cake
All-purpose flour (2 ¾ cups): This gives the cake its structure and texture. You can use bread flour instead, but it will change the flavor and texture. Be sure to sift the flour before measuring to get accurate amounts.
Unsalted butter (1 cup), softened: This adds richness and tenderness. You can use salted butter, but skip the added salt. Make sure the butter is at room temperature before using.
Granulated sugar (1 ¾ cups): This sweetens the cake and makes it tender. You can switch to brown sugar, but it will change the flavor. Measure the sugar carefully to avoid making the cake too sweet or not sweet enough.
Large eggs (3): These add moisture and richness to the cake. You can use egg replacers, but this will affect the texture. Use room-temperature eggs for the best results.
Whole milk (1 cup): This adds moisture and tenderness. You can use other types of milk, but it will change the flavor. Use room temperature milk for the best results.
Pure vanilla extract (1 teaspoon): This enhances the cake’s flavor and aroma. You can swap it with other extracts, but it may change the flavor. Use high-quality extract for the best results.
Salt (¼ teaspoon): This improves the cake’s flavor. You can leave it out if you use salted butter. Use high-quality salt for the best results.
Tools I Recommended Kitchen Tools
- Stand mixer: essential for creaming the butter and sugar.
- Cake pan: necessary for baking the cake.
- Whisk: useful for mixing the ingredients.
- Rubber spatula: necessary for scraping the sides of the bowl.
- Measuring cups: essential for measuring the ingredients.
- Measuring spoons: necessary for measuring the ingredients.
How to Make Hough Bakery White Cake
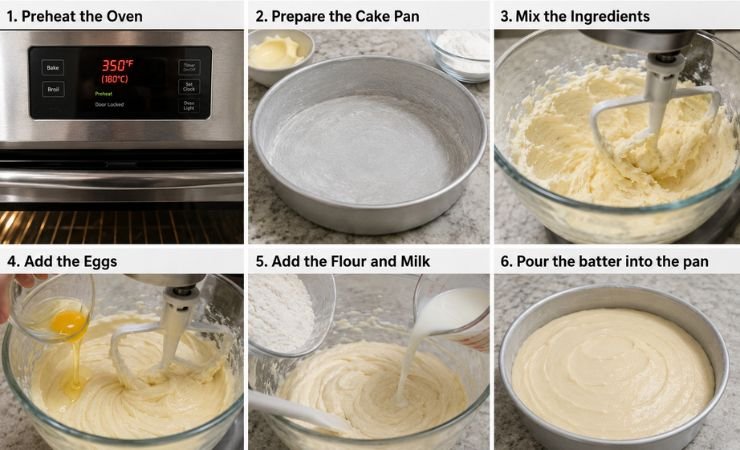
1. Preheat the Oven: Preheat your oven to 350°F (180°C). Preheating helps the oven prepare for baking the cake. While it heats, check that the oven racks are in the right position for even baking. You’ll know it’s ready when you hear a beep and see the correct temperature.
2. the Cake Pan: Next, grease the cake pan with butter and dust it with flour. This makes it easier to remove the cake after baking. Make sure to grease all the corners, as missed spots can cause sticking. The coating should be even and smooth. If the pan isn’t well greased, the cake may be hard to remove.
3. Mix the Ingredients: Now, mix the ingredients, starting with the butter and sugar. Cream them together until they are light and fluffy, which takes about 3-4 minutes with a stand mixer. While mixing, scrape down the sides of the bowl often. The mixture should look pale, fluffy, and smooth.
4. Add the Eggs: Next, add the eggs one at a time. Make sure each egg mixes in fully before adding the next one. This helps evenly distribute the eggs throughout the batter. It’s a good idea to beat the eggs slightly before adding them; this adds air and helps make the cake lighter. When done, the batter should be smooth with no streaks.
5. Add the Flour and Milk: Now, add the flour and milk alternately, starting and ending with flour. This step is important for the cake’s structure and moisture. Mix gently; overmixing can make the cake tough or dense. The batter should be smooth, thick, and pourable. If you overmix, the cake may turn out tough.
6. Pour the batter into the pan: Finally, pour the batter into the prepared pan and smooth the top. This helps the cake bake evenly and look nice. When pouring, make sure to fill the corners and eliminate any air pockets, as they can cause uneven baking. The top should be smooth and even, with no air pockets showing.
If you don’t smooth the top, the cake surface may come out uneven or lumpy.
Expert Tips for a Perfect Bake Every Time
Avoid Overmixing: One common mistake when making this cake is overmixing the batter. Overmixing can make the cake tough or dense, rather than light and fluffy. Mix the ingredients just until they are combined, then stop. This will help keep the cake’s structure delicate and ensure it bakes up light and tender.
Use Room Temperature Ingredients: It is important to use room temperature ingredients, especially butter and eggs. This helps the cake mix blend smoothly and evenly, resulting in a light, tender texture. If you use cold ingredients, the cake may turn out dense or uneven.
Take the time to let them come to room temperature before you start.
Don’t Overbake: Avoid overbaking the cake, as it can dry out and become tough. Check the cake frequently while it bakes and take it out of the oven as soon as it is done. You can test the cake by inserting a toothpick into the center; if it comes out clean, the cake is ready.
Fun Flavor Variations to Try
Lemon Lavender Cake: This version adds a fresh lemon flavor to the classic cake with lemon zest and dried lavender. You can also top it with a lemon glaze for extra taste. This cake is ideal for spring and summer when lemon and lavender are in season.
Chocolate Ganache Cake: This version adds rich flavor to the classic cake with dark chocolate and heavy cream. You can mix in chopped nuts or chocolate chips for added texture. This cake is perfect for chocolate lovers and makes a great special treat or dessert.
Gluten-Free Cake: This version is safe for those with gluten intolerance or sensitivity. It uses gluten-free flours and starches instead of regular flour. You can include xanthan gum to improve texture and structure. This cake is suitable for anyone avoiding gluten and can be enjoyed as a special treat or dessert.
What to Serve Alongside This White Cake
To serve this cake, choose something that contrasts with its rich, soft texture. A good option is a crunchy topping, like chopped nuts or cookies. You can also use flavored whipped cream or ice cream, such as vanilla or strawberry.
For a savory choice, serve fresh fruit or cheese alongside the cake. When it comes to drinks, a hot cup of coffee or tea pairs well. It cuts through the richness and balances the flavors.
Storage, Freezing, and Reheating Guide
You can make the cake ahead of time. You can store it in the fridge for up to 3 days or freeze it for up to 2 months. It’s best to assemble and decorate the cake just before serving, so it looks nice. Wrap the cake tightly in plastic wrap or aluminum foil to keep it from drying out. You can also keep it at room temperature for up to 3 days if it’s in an airtight container.
To reheat the cake, wrap it in foil and heat it in the oven at 350°F (180°C) for about 10-15 minutes or until warm. You can use the microwave for a few seconds, but be careful not to overheat it. Check the cake often to avoid burning.
When you want to store the cake in the freezer, wrap it tightly in plastic wrap or aluminum foil and place it in a freezer-safe bag. Label the bag with the date and the cake type, and keep it in the freezer for up to 2 months. When you’re ready to serve, thaw the cake overnight in the fridge or leave it at room temperature for a few hours.
Frequently Asked Questions
1. Can I use gluten-free flour instead of regular flour?
Yes, you can use gluten-free flour, but you should adjust the amount and add xanthan gum to improve texture and structure. Remember, gluten-free flours can alter the flavor and texture of the cake, so you may need to make additional adjustments. It’s best to use a high-quality gluten-free baking flour blend.
2. Can I make a larger cake?
Yes, you can make a larger cake, but you will need to change the baking time. A general rule is to add 10-15 minutes for each extra inch of cake diameter. Keep an eye on the cake while it bakes, as baking times can vary based on size.
3. What if the cake doesn’t turn out well?
If the cake doesn’t turn out as expected, don’t worry. This often happens because of a small mistake. Check your ingredients and measurements for accuracy, and try again. If problems continue, consider adjusting the recipe or asking a baking expert for help.
4. Can I add other flavors to the cake?
Yes, you can add flavors, such as extracts or spices, to make the cake unique. However, be careful not to add too many flavors, as they might overpower the cake. Start with a little and adjust to your taste. Use high-quality flavorings and balance them well.

Hough Bakery White Cake Recipe
Make the classic Hough Bakery White Cake Recipe at home with simple ingredients for a soft, tender, and unforgettable dessert every time.
Ingredients
- All-Purpose Flour — 2 ¾ cups
- Unsalted Butter, softened — 1 cup
- Granulated Sugar — 1 ¾ cups
- Large Eggs — 3
- Whole Milk — 1 cup
- Pure Vanilla Extract — 1 teaspoon
- Salt — ¼ teaspoon
Instructions
- Preheat the Oven: Preheat your oven to 350°F (180°C). Preheating helps the oven prepare for baking the cake. While it heats, check that the oven racks are in the right position for even baking. You'll know it's ready when you hear a beep and see the correct temperature.
- The Cake Pan: Next, grease the cake pan with butter and dust it with flour. This makes it easier to remove the cake after baking. Make sure to grease all the corners, as missed spots can cause sticking. The coating should be even and smooth. If the pan isn't well greased, the cake may be hard to remove.
- Mix the Ingredients: Now, mix the ingredients, starting with the butter and sugar. Cream them together until they are light and fluffy, which takes about 3-4 minutes with a stand mixer. While mixing, scrape down the sides of the bowl often. The mixture should look pale, fluffy, and smooth.
- Add the Eggs: Next, add the eggs one at a time. Make sure each egg mixes in fully before adding the next one. This helps evenly distribute the eggs throughout the batter. It's a good idea to beat the eggs slightly before adding them; this adds air and helps make the cake lighter. When done, the batter should be smooth with no streaks.
- Add the Flour and Milk: Now, add the flour and milk alternately, starting and ending with flour. This step is important for the cake's structure and moisture. Mix gently; overmixing can make the cake tough or dense. The batter should be smooth, thick, and pourable. If you overmix, the cake may turn out tough.
- Pour the batter into the pan: Finally, pour the batter into the prepared pan and smooth the top. This helps the cake bake evenly and look nice. When pouring, make sure to fill the corners and eliminate any air pockets, as they can cause uneven baking. The top should be smooth and even, with no air pockets showing. If you don't smooth the top, the cake surface may come out uneven or lumpy.
Nutrition Information:
Serving Size: 1Amount Per Serving: Calories: 320
As I reflect on the Hough Bakery White Cake, I know you’ll love making and serving it as much as I do. With its classic flavor and tender texture, it’s the perfect choice for any occasion, and with these tips and tricks, you’ll be well on your way to creating a truly unforgettable dessert.
I’m confident that the Hough Bakery White Cake Recipe will become a staple in your kitchen, just as it has in mine.